Arduino 蓝牙遥控+超声避障小车
成品预览
上面是买家秀
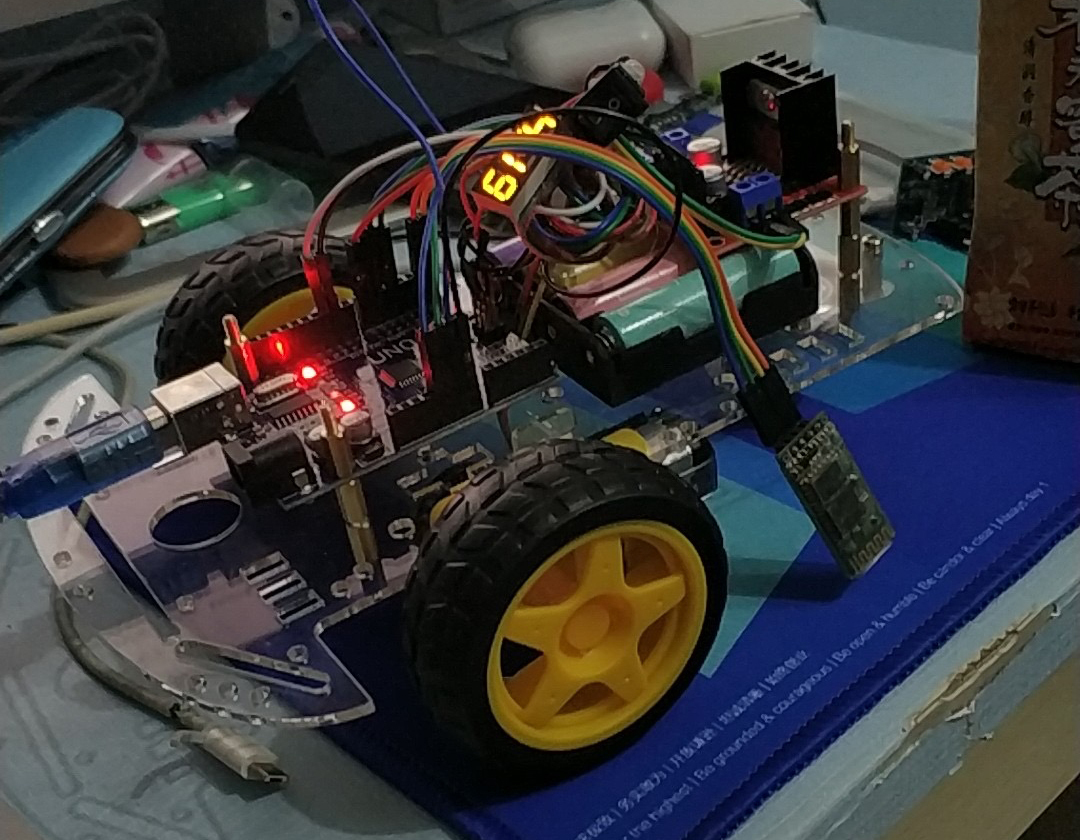
这张才是我做的(超声波模块被我拔了):
电路图
在[Bluetooth App-Controlled Dual Motor Device](https://fritzing.org/projects/bluetooth-app-controlled-dual-motor-device "Bluetooth App-Controlled Dual Motor Device")基础上进行修改:
材料
Arduino UNO 片上资源

其中,左下角部分支持模拟量(Analog)的 PIN(A0 到 A5)的编号是 14 到 19。
L298N 模块 PWM 调速
如何理解 PWM
PWM,英文全称 Pulse Width Modulation,中文脉冲宽度调制。脉冲宽度调制是将模拟信号变换为脉冲的一种技术。
假设一个场景:一个电灯接在电路中正常工作。突然,好巧不巧,电路中的开关虚接了,导致电灯忽明忽暗。如果闪烁的频率足够快,那么人眼是无法分辨出来电灯的闪烁的,电影、视频都是这个原理。但是有一点,电灯的亮度一定会下降。当灯亮的时间占总时间的比例大的时候,人眼的感觉灯会变得亮一些,灯暗的时间占得比例越大,那么人眼的感觉自然会是灯变暗了。
如果理解上面的场景,那么就能够理解 PWM 的精髓了。PWM 是一种对模拟信号电平进行数字编码的方法。上述场景中提到的电灯亮的时间占总时间的比例,可以类比 PWM 中的“占空比”概念。“占空比”是指一个脉冲循环内,通电时间占总时间的比例。例如脉冲宽度 0.001ms,信号周期 0.004ms 的脉冲序列,占空比为 0.25。
如果脉冲(方波)的峰值电压为 5V,在脉冲占空比为 0.25 时候,等效电压值为方波峰值电压和占空比的乘积 1.25V
PS: 我已经讲得足够简单了,如果还读不懂的话,建议提前去补补课。接下来的部分难度会比这个还要难。
L298N 模块
L298 是 ST 公司生产的双全桥驱动器(DUAL FULL-BRIDGE DRIVER),[datasheet](http://www.waveshare.net/datasheet/ST_PDF/L298.PDF "datasheet")。工作电压在 4.8-46V 之间,输出电流高达 2A。可以驱动两个二相电机,一般用来四轮驱动小车,驱动两轮小车的话,真有种杀鸡焉用宰牛刀的感觉。
L298N 模块可以直接与单片机相连,控制起来非常方便。
L298N 逻辑功能表
| IN1 | IN2 | ENA | 状态 |
| --- | --- | --- | ------ |
| X | X | 0 | 停止 |
| 1 | 0 | 1 | 顺时针 |
| 0 | 1 | 1 | 逆时针 |
| 1 | 1 | 0 | 停止 |
其中,IN3、IN4、ENB 的逻辑与上表相同。
HC_SR04 超声波模块测距
HC_SR04 工作原理

观察以上时序图,当提供一个 10us 以上的触发信号,HC_SR04 内部将发出 8 个 40kHz 的周期电平并检测回波。一旦检测出有回波信号,则停止输出回响信号。故回响信号的脉冲宽度和距离成正比。由此则可计算出距离。
取声速 343m/s(干燥、室温 20 度),1 微秒传过的距离是 0.0343 厘米。取倒数,则得到声音每传播 1 厘米,需要 29.15 微秒。
又因为从声音发出到接收回波,声音走过的路程应该是距离的 2 倍,实际距离 1 厘米,需要对应 58.3 微秒,取整 58 即可。
故在程序中可见这样的代码:
```c++
int getDistance () {
digitalWrite(ultrasonicOutputPin, LOW);
delayMicroseconds(2);
digitalWrite(ultrasonicOutputPin, HIGH);
delayMicroseconds(10);
digitalWrite(ultrasonicOutputPin, LOW);
int distance = pulseIn(ultrasonicInputPin, HIGH);
distance = distance / 58;
return distance > 0 ? distance: 0;
}
在上述代码中,ultrasonicOutputPin 连接超声波模块的 Trig 引脚,ultrasonicInputPin连接超声波模块的 Echo 引脚。

基于超声波模块的工作原理,故超声波测距适用于坚硬平整的较大物体,其他场景性能不佳。

## HC-06(HC-05)蓝牙模块

HC-06 和 HC-05 模块大致差不多,对于 Arduino 的用户,一般从淘宝直接买 JY-MCU,本人也不例外。模块使用起来和串口类似。模块提供的[用户指引(User Guide)](https://core-electronics.com.au/attachments/guides/Product-User-Guide-JY-MCU-Bluetooth-UART-R1-0.pdf "用户指引(User Guide)")中提供了丰富详尽的例子,同样在下面的文章中我也会简单介绍。

考虑到小车的拓展性,例如之后可能会接 ESP8266 啥的,暂时先不占用 Arduino 的硬件串口,留着以后使用,蓝牙模块与板子的连接使用软串口的方式。同样软串口相关的内容会在下面进行阐述。

软串口连接蓝牙模块的参考代码如下:

```cpp
#include

SoftwareSerial bluetoothSerial(11, 12); // RX, TX

void setup() {
  // put your setup code here, to run once:
  Serial.begin(57600);
  bluetoothSerial.begin(57600);
   bluetoothSerial.print("AT");
  delay(1000);
  bluetoothSerial.println("AT+VERSION");
  delay(1000);
  bluetoothSerial.println("AT+BAUD7");
  delay(1000);
  bluetoothSerial.println("AT+NAMEarduino_car");
  delay(1000);
}
void bluetoothTaskCallback() {
  if (bluetoothSerial.available()) {
    int bluetoothCmd = (int)bluetoothSerial.read();
    Serial.print("bluttooth Command: ");
    Serial.println(bluetoothCmd);

    // TODO: 蓝牙传入参数校验
    motorCtrl(bluetoothCmd);
  }
  if (Serial.available()) {
    Serial.print("Serial available: ");
    Serial.println(Serial.read());
    bluetoothSerial.write(Serial.read());
  }
}
在上述代码中,Arduino 软串口的接收引脚(RX)为 11,与蓝牙模块的发送引脚(TX)连接。发送引脚(TX)为 12,与蓝牙模块的接收引脚(RX)。
在板子初始化过程中,使用 指令对蓝牙模块进行了一些设置:
设置蓝牙模块的波特率为 57600bps(对于 Arduino 软串口的最高速率)。只有两边波特率设置的一样,才可以正常通信。
设置蓝牙的名称为“arduino car”,方便我们使用蓝牙调试助手进行连接。
软件模拟串口
除了硬件串口(板子上的 D0、D1 口),Arduino 还提供了 SoftwareSerial 类库,支持用户将其他数字引脚(D\*)通过程序模拟成串口通讯引脚。
软件模拟串口简称软串口,使用方法和硬件串口基本一样。类库的详细介绍见[Arduino Reference SoftwareSerial Libray](https://www.arduino.cc/en/Reference/softwareSerial "Arduino Reference SoftwareSerial Libray")。
在 Reference 中指出,软串口有着以下一系列的局限性:
The library has the following known limitations:
>
- If using multiple software serial ports, only one can receive data at a time.
- Not all pins on the Mega and Mega 2560 support change interrupts, so only the following can be used for RX: 10, 11, 12, 13, 14, 15, 50, 51, 52, 53, A8 (62), A9 (63), A10 (64), A11 (65), A12 (66), A13 (67), A14 (68), A15 (69).
- Not all pins on the Leonardo and Micro support change interrupts, so only the following can be used for RX: 8, 9, 10, 11, 14 (MISO), 15 (SCK), 16 (MOSI).
- On Arduino or Genuino 101 the current maximum RX speed is 57600bps
- On Arduino or Genuino 101 RX doesn't work on Pin 13
>
If your project requires simultaneous data flows, see Paul Stoffregen's [AltSoftSerial library](http://www.pjrc.com/teensy/td
libs AltSoftSerial.html "AltSoftSerial library"). AltSoftSerial overcomes a number of other issues with the core SoftwareSerial, but has it's own limitations. Refer to the [AltSoftSerial site](http://www.pjrc.com/teensy/tdlibs AltSoftSerial.html "AltSoftSerial site") for more information.
翻译过来的话,大意如下:
这个类库有以下已知限制:
>
- 如果使用多个软串口,则一次只能接收到一个数据,串口之间会相互干扰。
- 因为 Mega 和 Mega2560 板子上并不是所有的引脚都支持更改中断(interrupt),所以只有以下引脚能做软串口的接收引脚(RX): 10, 11, 12, 13, 14, 15, 50, 51, 52, 53, A8 (62), A9 (63), A10 (64), A11 (65), A12 (66), A13 (67), A14 (68), A15 (69)。
- 在 Arduino 和 Genuino 101 上,最大的接收速率是 57600bps。
- 在 Arduino 和 Genuino 101 上,接收引脚(RX)不能是 13 号引脚。
>
如果你的项目中需要同步数据流,那么请参阅 Paul Stoffregen 的 AltSoftSerial 库。AltSoftSerial 还解决了 SoftwareSerial 中一些其他的问题,但是它也有着自己的局限性。更多信息请参考 AltSoftSerial 网站。
蓝牙串口助手
为了方便,我选择使用 Android 手机作为蓝牙主机(Master),蓝牙串口模块做从机(Salve)。或者叫 Leader 和 Follower 会更好,Master 和 Salve 有违反人权之嫌疑。

蓝牙串口助手的设置过程比较繁琐,我在设置过程中参考了 CSDN 博主“不懂音乐的欣赏者”的 [Arduino 智能小车——蓝牙小车](https://blog.csdn.net/qq_16775293/article/details/77489166 "Arduino 智能小车——蓝牙小车")一文。
通过手机的蓝牙串口助手,可以给小车下达一系列指令,指令的内容如下:
| 指令 | 含义 | 备注 |
| ---- | ---- | ---- |
| 01 | 停止 | |
| 02 | 前进 | |
| 03 | 后退 |
| 04 | 左转 | |
| 05 | 右转 | |
| 06 | 调速 | |
具体的控制函数有些复杂,之后可以考虑单独用一篇文章阐述一下。
任务调度
目前来讲,小车支持蓝牙遥控、调速,并且在前进的方向放置了超声波模块检测距离,防止碰撞。两个任务可以放在 中,通过 控制时间。这种方式貌似可以解决问题(虽然有些 low),但是如果任务多起来的话,显然会力不从心。
为了更好地协调两个任务,保证两个任务有条不紊的运行,故引入了调度器。调度器可以以特定的周期执行任务。
代码中使用的调度器 [Github Repo](https://github.com/arkhipenko/TaskScheduler "Github Repo"):https://github.com/arkhipenko/TaskScheduler
调用的参考代码:
#include

Scheduler runner;

void ultrasonicTaskCallback();
void bluetoothTaskCallback();

Task bluetoothTask(150,TASKFOREVER,&bluetoothTaskCallback, &runner, true);
Task ultrasonicTask(500,TASKFOREVER,&ultrasonicTaskCallback, &runner,true);

void loop() {
  runner.execute();
}
结语
文章当中涉及到很大一部分内容是工科学生基本学习过的内容,比如 PWM、串口通信、超声波测距、电机控制等等。但是在写作的过程中,发现通过短短的几千个字就讲清楚如何做一个 Arduino 小车,并让它跑起来恐怕还是有些困难。因为这些东西看起来简单,但是涉及到的知识范围还是蛮广的。
在实验的过程中,如果有什么问题的话,可以通过公众号或者评论区联系到我。
完整代码
完整代码访问 [arduino
具体对应的 PIN 依据实际情况请进行修改,本文中为了方便作图,修改了部分 GPIO 号,保证图文对应
#include
#include

#define STOP 0
#define FORWARD 1
#define BACKWARD 2
#define TURNLEFT 3
#define TURNRIGHT 4
#define CHANGESPEED 5


#define DEFAULTVOLTAGE 150

#define MINVOLTAGE 0

#define MAXVOLTAGE 255

#define LOWSPEED 0
#define HIGHSPEED 1

SoftwareSerial bluetoothSerial(11, 12); // RX, TX

 Scheduler runner;

 void ultrasonicTaskCallback();
 void bluetoothTaskCallback();

Task bluetoothTask(150,TASKFOREVER,&bluetoothTaskCallback, &runner, true);
Task ultrasonicTask(500,TASKFOREVER,&ultrasonicTaskCallback, &runner,true);


// declare motor driver module ctrl pin:
int leftMotorPin1 = 7;
int leftMotorPin2 = 6;
int rightMotorPin1 = 5;
int rightMotorPin2 = 4;

int leftPWM = 10;
int rightPWM = 9;

int ultrasonicInputPin = 2; // Echo
int ultrasonicOutputPin = 3; // Trig

int motorAction = STOP;
int motorVoltage = MINVOLTAGE;
int motorSpeedLevel = HIGHSPEED;

int distance = 0;
/
  motor ctrl matrix
  1. stop
  2. forward
  3. backward
  4. turn left
  5. turn right
/
int ctrlMatrix[5][4] = {
  {LOW, LOW, LOW, LOW},
  {LOW, HIGH, LOW, HIGH},
  {HIGH, LOW, HIGH, LOW},
  {HIGH, LOW, LOW, HIGH},
  {LOW, HIGH, HIGH, LOW}
};


void motorRun(int cmd) {
  Serial.print("recv cmd: ");
  Serial.println(cmd);
  digitalWrite(leftMotorPin1, ctrlMatrix[cmd][0]);
  digitalWrite(leftMotorPin2, ctrlMatrix[cmd][1]);
  digitalWrite(rightMotorPin1, ctrlMatrix[cmd][2]);
  digitalWrite(rightMotorPin2, ctrlMatrix[cmd][3]);
}


void changeSpeed(int voltage) {
  Serial.print("recv voltage: ");
  Serial.println(voltage);
  analogWrite(leftPWM, voltage);
  analogWrite(rightPWM, voltage);
}

void changeSpeedLevel(int level) {
  Serial.print("recv voltage level: ");
  Serial.println(level);
  if (level == HIGHSPEED) {
    analogWrite(leftPWM, MAXVOLTAGE);
    analogWrite(rightPWM, MAXVOLTAGE);
  } else {
    analogWrite(leftPWM, DEFAULTVOLTAGE);
    analogWrite(rightPWM, DEFAULTVOLTAGE);
  }

}
void bluetoothTaskCallback() {
  if (bluetoothSerial.available()) {
    int bluetoothCmd = (int)bluetoothSerial.read();
    Serial.print("bluttooth Command: ");
    Serial.println(bluetoothCmd);
    motorCtrl(bluetoothCmd);
  }
  if (Serial.available()) {
    Serial.print("Serial available: ");
    Serial.println(Serial.read());
    bluetoothSerial.write(Serial.read());
  }
}

void ultrasonicTaskCallback() {
  int distance = getDistance();
  if (distance <= 30) {
    motorRun(STOP);
    Serial.print("distance is dangerous: ");
    Serial.println(distance);
    if (bluetoothSerial.available()) {
      bluetoothSerial.print("distance is dangerous: ");
      bluetoothSerial.println(distance);
    }
    changeSpeedLevel(LOWSPEED);
    motorRun(STOP);
  } else if (distance >= 100) {
    if (bluetoothSerial.available()) {
      bluetoothSerial.print("distance is fine,speed up: ");
      bluetoothSerial.println(distance);
    }
    motorRun(motorAction);
    changeSpeedLevel(HIGHSPEED);
  } else {
    if (bluetoothSerial.available()) {
      bluetoothSerial.print("distance is just ok: ");
      bluetoothSerial.println(distance);
    }
    motorRun(motorAction);
  }

}

void setup()
{
  // put your setup code here, to run once:
  Serial.begin(57600);
  bluetoothSerial.begin(57600);
   bluetoothSerial.print("AT");
  delay(1000);
  bluetoothSerial.println("AT+VERSION");
  delay(1000);
  bluetoothSerial.println("AT+BAUD7");
  delay(1000);
  bluetoothSerial.println("AT+NAMEarduino_car");
  delay(1000);
  // set pin mode for motor
  pinMode(leftMotorPin1, OUTPUT);
  pinMode(leftMotorPin2, OUTPUT);
  pinMode(rightMotorPin1, OUTPUT);
  pinMode(rightMotorPin2, OUTPUT);
  pinMode(leftPWM, OUTPUT);
  pinMode(rightPWM, OUTPUT);

  pinMode(ultrasonicInputPin, INPUT);
  pinMode(ultrasonicOutputPin, OUTPUT);
  changeSpeedLevel(motorSpeedLevel);
  runner.startNow();
  Serial.println("setup has been down.");
}
void motorCtrl(int cmd) {
  if (cmd >= STOP && cmd <= TURNRIGHT) {
    motorAction = cmd;
    motorRun(motorAction);
  } else if (cmd > DEFAULTVOLTAGE && cmd <= MAXVOLTAGE) {
    motorVoltage = cmd;
    changeSpeed(cmd);
  } else if (cmd == CHANGESPEED) {
    if (motorSpeedLevel == LOWSPEED) {
      motorSpeedLevel = HIGHSPEED;
    } else {
      motorSpeedLevel = LOWSPEED;
    }
    changeSpeedLevel(motorSpeedLevel);
  }

}

int getDistance () {
  digitalWrite(ultrasonicOutputPin, LOW);
  delayMicroseconds(2);
  digitalWrite(ultrasonicOutputPin, HIGH);
  delayMicroseconds(10);
  digitalWrite(ultrasonicOutputPin, LOW);

  int distance = pulseIn(ultrasonicInputPin, HIGH);
  distance = distance / 58;
  return distance > 0 ? distance: 0;
}

void loop() {
  runner.execute();
}