DCache 分布式存储系统|List 缓存模块的创建与使用

作者 | Eaton
导语 | 在之前的系列文章中,我们介绍了 DCache 及其 KV 和 K-K-Row 缓存模块的使用,本文将继续介绍如何使用 DCache 中的列表类型缓存模块 —— List 缓存模块。
系列文章
- DCache 分布式存储系统|List 缓存模块的创建与使用
目录
- List 模块简介
- 创建 List 缓存模块
- 获取 DCache 接口文件
- 创建缓存服务代理
- 调用 List 缓存模块服务
- List 模块读写操作
- 实例
- 其它 List 缓存模块服务接口
- 总结
DCache 是一个基于 TARS 框架开发的分布式 NoSQL 存储系统,支持多种数据结构,包括了 (键值对),(多键值),(列表),(集合),(有序集合)等,满足多种业务需求。
在前面的文章中,我们介绍过 和 两种类型缓存模块的使用方式,本文将继续介绍 类型缓存模块的使用。
List 模块简介
即链表,常用于消息的排列,比如 QQ、微信的聊天消息排序。常用的有单向链表和双向链表,由若干链表节点组成,如下图。

单向链表,每个节点存储该节点的数据和下一个节点的地址;双向链表的每个节点则额外包含上一个节点的地址。
DCache 中的 List 模块是基于双向链表实现的,每一个内存数据单元 Block 包含两个指针,分别指向前一个 Block 和后一个 Block。DCache 还提供了操作 中某一段的 API,你可以直接查询、删除、替换和裁剪 中某一段的元素。如下图为双向链表的结构及替换操作的原理。

同样地,与其它模块相似,我们完成以下步骤即可在服务中使用 缓存服务
本文将继续基于 介绍如何创建 List 缓存模块,以及怎么在 TARS 服务中调用该服务来缓存数据。
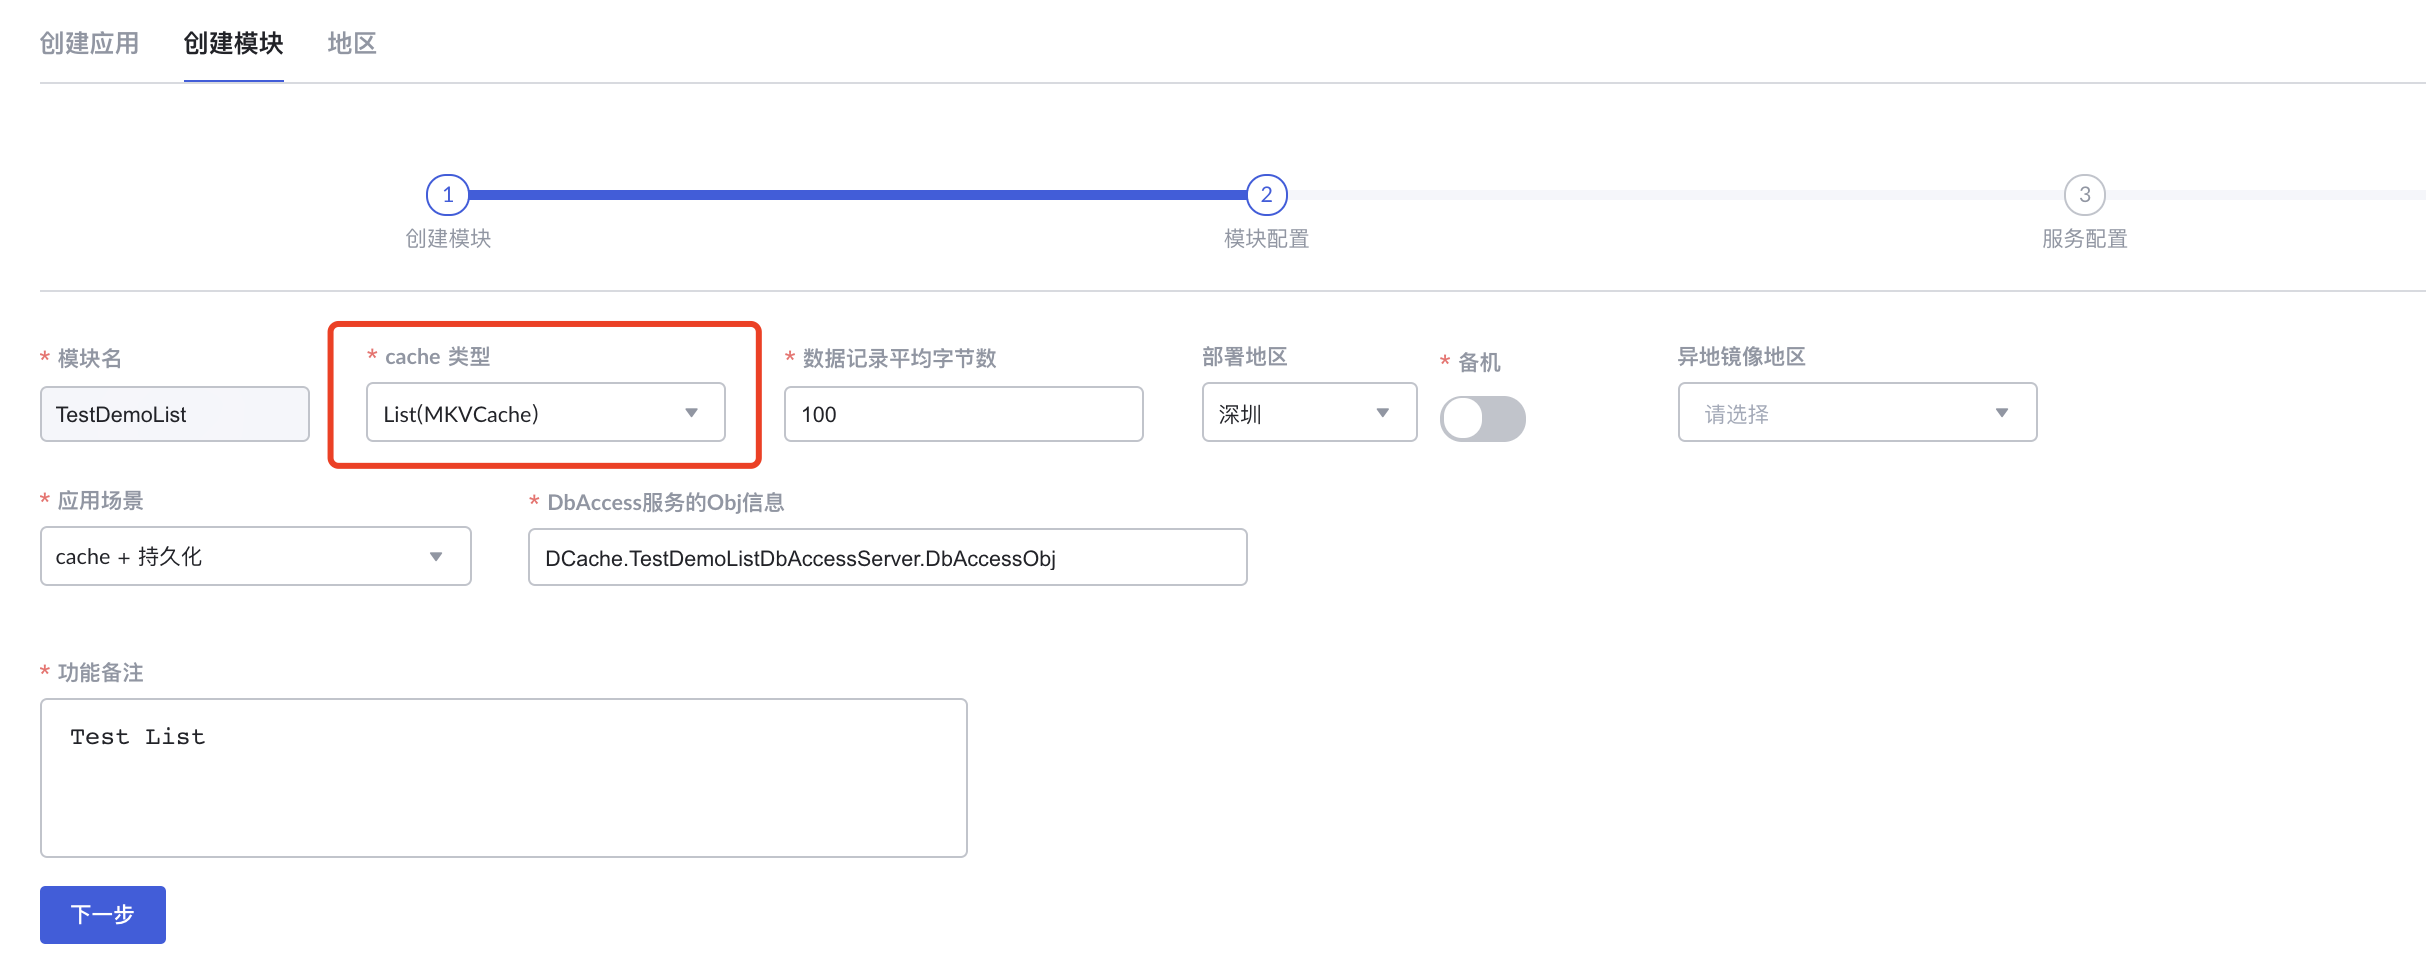
创建 List 缓存模块
前面的文章我们已经介绍过缓存模块的创建,各类型缓存模块创建流程是相似的,这部分不再赘述
过程类似,这里命名为 , 选择
获取 DCache 接口文件
我们提到过,DCache 是基于 TARS 开发的,因此使用上和 TARS 服务一样,也是通过 接口文件来调用对应缓存服务的接口。不同的是,DCache 的接口文件是固定的,我们只需复制 下的 , [ProxyShare.tars](https://github.com/Tencent/DCache/blob/master/src/TarsComm/ProxyShare.tars) 和 下的 [Proxy.tars](https://github.com/Tencent/DCache/blob/master/src/Proxy/Proxy.tars) 到自己项目目录下即可。
例如本文 Demo 获取 DCache 接口文件后的项目文件结构如下
DCacheDemo
├── CacheShare.tars
├── ProxyShare.tars
├── Proxy.tars
├── config.conf
├── main.cpp
└── makefile
创建缓存服务代理
前面的文章中我们提到过,创建一个应用后会自动创建一个路由服务和代理服务,并通过 介绍了如何创建缓存服务代理来调用服务。
我们继续使用 ,新增一个模块名 ,值为我们前面创建的模块名 ,用于之后通过代理调用该模块,如下。
// main.cpp
#include
#include 调用缓存模块服务
通过 代理服务的代理对象和模块名 ,我们就能够调用前面创建的 List 缓存模块的接口了。
本部分将通过简单示例,介绍 类型缓存模块部分接口的使用。关于其它接口的信息,参见 。
接口调用流程与 TARS 服务接口调用流程一致。如果你还不清楚 TARS 服务的调用方式和流程,可以阅读文章 了解 TARS 服务的调用方式。
后面的示例中,会使用到三个工具函数,定义如下
// 构建 UpdateValue
DCache::UpdateValue genUpdateValue(DCache::Op op, const string &value)
{
DCache::UpdateValue updateValue;
updateValue.op = op;
updateValue.value = value;
return updateValue;
}
// 打印 map 类型数据
void printMapData(const map &data)
{
map::const_iterator it = data.begin();
while (it != data.end())
{
cout << "|" << it->first << ":" << it->second;
++it;
}
cout << endl;
}
// 打印 vector 那么接下来,我们来看看怎么使用 DCache 的 List 缓存模块。
List 模块读写操作
List 模块即列表缓存模块。这里介绍写接口 和读接口 ,其它接口用法类似。
向列表插入数据
接口 用于向列表头部或者末尾插入数据,定义如下
int pushList(const PushListReq &req)其中结构 定义如下
struct PushListReq
{
  1 require string moduleName; // 模块名
  2 require string mainKey;    // 主key
  3 require vector data;  // 待插入数据
  4 require bool atHead = true;   // true 表示插入到 list 头部,false 表示插入尾部
};
使用示例如下
void testPushList(const string &mainKey, const vector> &data, DCache::ProxyPrx prx)
{
    cout << SUBTEST_PREFIX << "pushList " << endl;
    // 构造请求
    DCache::PushListReq req;
    req.moduleName = ModuleTestDemoList;
    req.mainKey = mainKey;

    for (auto item : data)
    {
        DCache::InsertKeyValue insertValue;
        insertValue.mainKey = mainKey;
        insertValue.expireTimeSecond = 60 * 60 * 24;

        map::const_iterator it = item.begin();
        while (it != item.end())
        {
            insertValue.mpValue[it->first] = genUpdateValue(DCache::SET, it->second);
            ++it;
        }
        req.data.push_back(insertValue);
    }

    int ret = prx->pushList(req);

    if (ret == DCache::ET_SUCC)
    {
        printVectorMapData(data);
        return;
    }
    cout << "ret: " << ret << endl;
}
获取列表数据
接口 用于根据指定的主 key 和索引查询列表的数据,定义如下
int getList(const GetListReq &req, GetListRsp &rsp)其中请求消息结构 和返回消息结构 及其嵌套结构 的定义如下
struct GetListReq
{
  1 require string moduleName;  // 模块名
  2 require string mainKey;  // 主key
  3 require string field;    // 需要查询的字段集,多个字段用','分隔如 "a,b", "*"表示所有
  4 require long index;      //索引
  5 require string idcSpecified = "";  //idc区域
};

struct GetListRsp
{
  1 require Entry entry;  // 查询结果
};

struct Entry
{
  1 require map data;
};
使用示例如下
void testGetList(const string &mainKey, const long &index, DCache::ProxyPrx prx)
{
    cout << SUBTEST_PREFIX << "getList  ";

    // 构造请求
    DCache::GetListReq req;
    req.moduleName = ModuleTestDemoList;
    req.mainKey = mainKey;
    req.field = "*";
    req.index = index;

    DCache::GetListRsp rsp;
    int ret = prx->getList(req, rsp);

    // 打印返回值
    if (ret == DCache::ET_SUCC)
    {
        printMapData(rsp.entry.data);
        return;
    }
    cout << "ret:" << ret << endl;
}
实例
我们来实际运行一下上面的使用示例。完整的使用示例可以在 GitHub 仓库 中获取。
我们通过 测试上节提到的两个 List 读写接口,我们向主键为 的列表中插入一个值 ,如下
void testList(DCache::ProxyPrx prx)
{
    cout << START << " testList" << endl;

    string mainKey = "test";
    vector> data;

    // 构造两个插入数据
    map item1, item2;
    item1["VALUE"] = "test";
    item2["VALUE"] = "hello";

    data.push_back(item1);
    data.push_back(item2);

    testPushList(mainKey, data, prx);

    // 访问列表头部数据
    long index = 0;
    testGetList(mainKey, index, prx);

    cout << END << " testList" << endl;
}
接着,在 函数中执行
int main(int argc, char *argv[])
{
    ...

        auto prx = comm->stringToProxy(DCacheTestDemoObj);

        // 调用 DCache 缓存服务
        testList(prx);
    ...
}
执行结果如下

可以看到 返回的列表头部数据值为 。默认情况下, 是从列表头部插入数据的。
其它 List 缓存模块服务接口
除了获取列表数据接口 和读取键值接口 ,DCache 中还提供了丰富的 List 操作接口,包括批量插入(), 删除(), 更新() 等,如下
// 获取列表上指定的某一数据
int getList(GetListReq req, out GetListRsp rsp);
// 获取列表上指定范围的数据
int getRangeList(GetRangeListReq req, out BatchEntry rsp);
// 向列表头部或尾部插入数据
int pushList(PushListReq req);
// 弹出列表头部或尾部的数据
int popList(PopListReq req, out PopListRsp rsp);
// 替换列表中的数据
int replaceList(ReplaceListReq req);
// 裁剪列表,只保留指定区间,删除区间外的数据
int trimList(TrimListReq req);
// 从列表头部或者尾部删除一条或多条数据
int remList(RemListReq req);
接口的使用方式与前面介绍的 和 是类似的,关于接口的具体入参和出参结构可以参考 。
总结
本文简要介绍了 DCache 中的 缓存模块的原理和使用流程,同时通过具体实例对部分接口的使用进行了详细介绍,帮助读者理解并能够快速上手使用 缓存模块。
TARS 可以在考虑到易用性和高性能的同时快速构建系统并自动生成代码,帮助开发人员和企业以微服务的方式快速构建自己稳定可靠的分布式应用,从而令开发人员只关注业务逻辑,提高运营效率。多语言、敏捷研发、高可用和高效运营的特性使 TARS 成为企业级产品。
TARS微服务助您数字化转型,欢迎访问:
TARS官网:https://TarsCloud.org
TARS源码:https://github.com/TarsCloud
Linux基金会官方微服务免费课程:https://www.edx.org/course/building-microservice-platforms-with-tars
获取《TARS官方培训电子书》:https://wj.qq.com/s2/7849909/01b0/
或扫码获取: