AQS之ReentrantReadWriteLock写锁
1. 用法
1.1 定义一个安全的list集合
public class LockDemo  {
ArrayList arrayList = new ArrayList<>();//定义一个集合
// 定义读锁
ReentrantReadWriteLock.ReadLock readLock = new    ReentrantReadWriteLock(true).readLock();
// 定义写锁
ReentrantReadWriteLock.WriteLock writeLock = new ReentrantReadWriteLock(true).writeLock();

public void addEle(Integer ele) {
writeLock.lock(); // 获取写锁
arrayList.add(ele);
writeLock.unlock(); // 释放写锁
}
public Integer getEle(Integer index) {
try{
readLock.lock(); // 获取读锁
Integer res = arrayList.get(index);
return res;
} finally{
readLock.unlock();// 释放读锁
}
}
}
1.2 Sync 源码中的属性与方法在上一篇文章中已经讲过了
2. 获取写锁源码分析
ReentrantReadWriteLock中的lock方法
public void lock() {
sync.acquire(1);
}
AbstractQueuedSynchronizer中的acquire方法
public final void acquire(int arg) {
    // 获取锁失败则进入阻塞队列
if (!tryAcquire(arg) &&
acquireQueued(addWaiter(Node.EXCLUSIVE), arg))
selfInterrupt();
}
acquireQueued(addWaiter(Node.EXCLUSIVE), arg))*
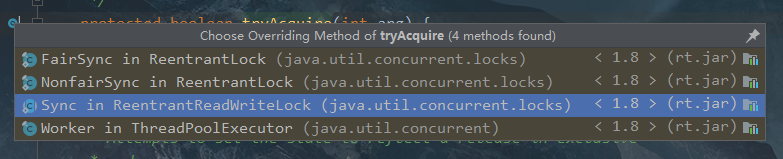
ReentrantReadWriteLock中的tryAcquire方法
protected final boolean tryAcquire(int acquires) {
    // 获取当前线程
    Thread current = Thread.currentThread();
    //  获取状态
    int c = getState();
    // 计算写线程数量就是独占锁的可从入数量
    int w = exclusiveCount(c);
    // 当前同步状态state != 0,说明已经有其他线程获取了读锁或写锁
    if (c != 0) {
       // 当前state不为0,此时:如果写锁状态为0说明读锁此时被占用返回false;
       // 如果写锁状态不为0且写锁没有被当前线程持有返回false
        if (w == 0 || current != getExclusiveOwnerThread())
            return false;
       // 判断同一线程获取写锁是否超过最大次数(65535),支持可重入
        if (w + exclusiveCount(acquires) > MAX_COUNT)
            throw new Error("Maximum lock count exceeded");
         //更新状态
         //此时当前线程已持有写锁,现在是重入,所以只需要修改锁的数量即可
        setState(c + acquires);
        return true;
    }
      //到这里说明此时c=0,读锁和写锁都没有被获取
      //writerShouldBlock表示是否阻塞
    if (writerShouldBlock() ||
        !compareAndSetState(c, c + acquires))
        return false;
        // 设置锁为当前线程所有
    setExclusiveOwnerThread(current);
    return true;
}
static final class FairSync extends Sync {
// 写锁是否应该被阻塞
    final boolean writerShouldBlock() {
return hasQueuedPredecessors();
}
}
3. 获取写锁流程图
3.1 流程图获取写锁过程
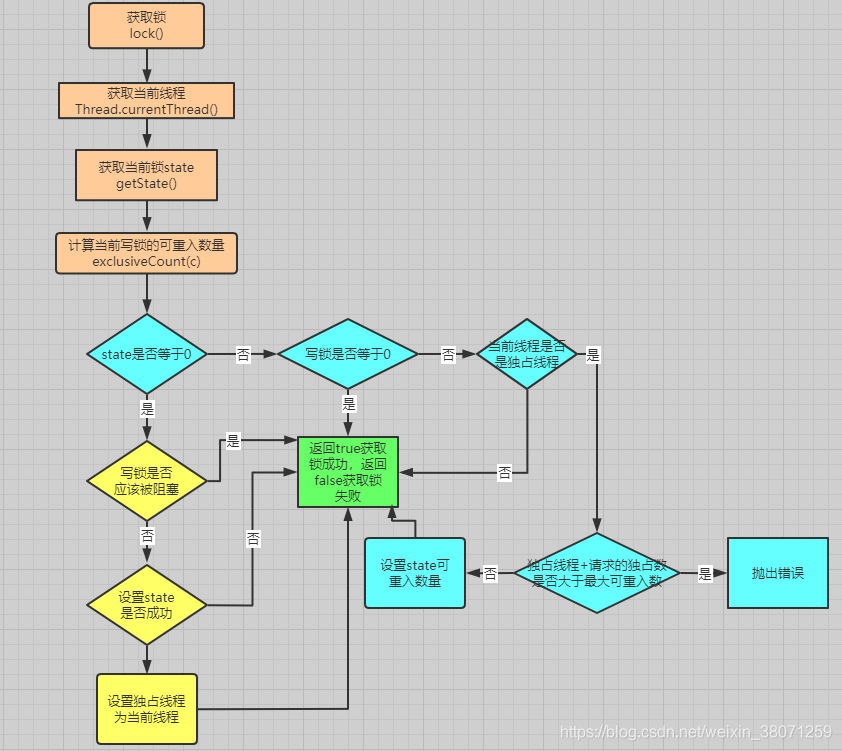
3.2 流程图获取写锁过程解析
写锁的获取过程如下:
4. 释放写锁源码分析
ReentrantReadWriteLock中的unlock方法
public void unlock() {
    sync.release(1);
}
AbstractQueuedSynchronizer中的release方法
public final boolean release(int arg) {
    // 如果返回true 那么释放成功了
    if (tryRelease(arg)) {
        Node h = head;
        // 如果头部不为空,并且头节点的waitStatus是唤醒状态那么唤醒后继线程
        if (h != null && h.waitStatus != 0)
         // 唤醒后继线程
            unparkSuccessor(h);
        return true;
    }
    return false;
}
ReentrantReadWriteLock中tryRelease方法
protected final boolean tryRelease(int releases) {
// 若锁的持有者不是当前线程,抛出异常
    if (!isHeldExclusively())
     // 非法的监控器异常
        throw new IllegalMonitorStateException();
        // 计算写锁的新线程数
    int nextc = getState() - releases;
    // 如果独占模式重入数为0了,说明独占模式被释放
    boolean free = exclusiveCount(nextc) == 0;
    if (free)
     // 设置独占线程为空
        setExclusiveOwnerThread(null);
    // 设置写锁的新线程数
    // 不管独占模式是否被释放,更新独占重入数
    setState(nextc);
    return free;
}
protected final boolean isHeldExclusively() {
    // 若当前线程是当前锁的持有线程那么返回true
    return getExclusiveOwnerThread() == Thread.currentThread();
}
5. 释放写锁流程图
5.1 流程图释放过程
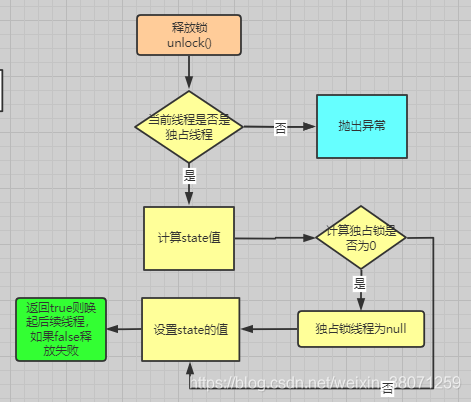
5.2 流程图释放过程解析
写锁的释放过程:
6. 总结
6.1 state 解析
private volatile int state;int 类型占有 4个字节一个字节8位,所以 state 一个 32 位,高 16 位 代表读锁 低 16 位代表 写锁。
// 0x0000FFFF 16 进制
// 1111111111111111 2 进制
// 65535 10 进制
static final int SHARED_SHIFT   = 16;
static final int SHARED_UNIT    = (1 << SHARED_SHIFT); // 65536
static final int MAX_COUNT      = (1 << SHARED_SHIFT) - 1; //65535
// 1111111111111111
static final int EXCLUSIVE_MASK = (1 << SHARED_SHIFT) - 1; // 65535
// 1111111111111111
如果此时同步状态位 c 那么获取写状态 c & EXCLUSIVE_MASK
如果此时同步状态位 c 那么获取读状态 c >>>16 无符号补0,右移16位
6.2 注意
*以上便是ReentrantReadWriteLock中写锁的分析,下一篇文章将是**